
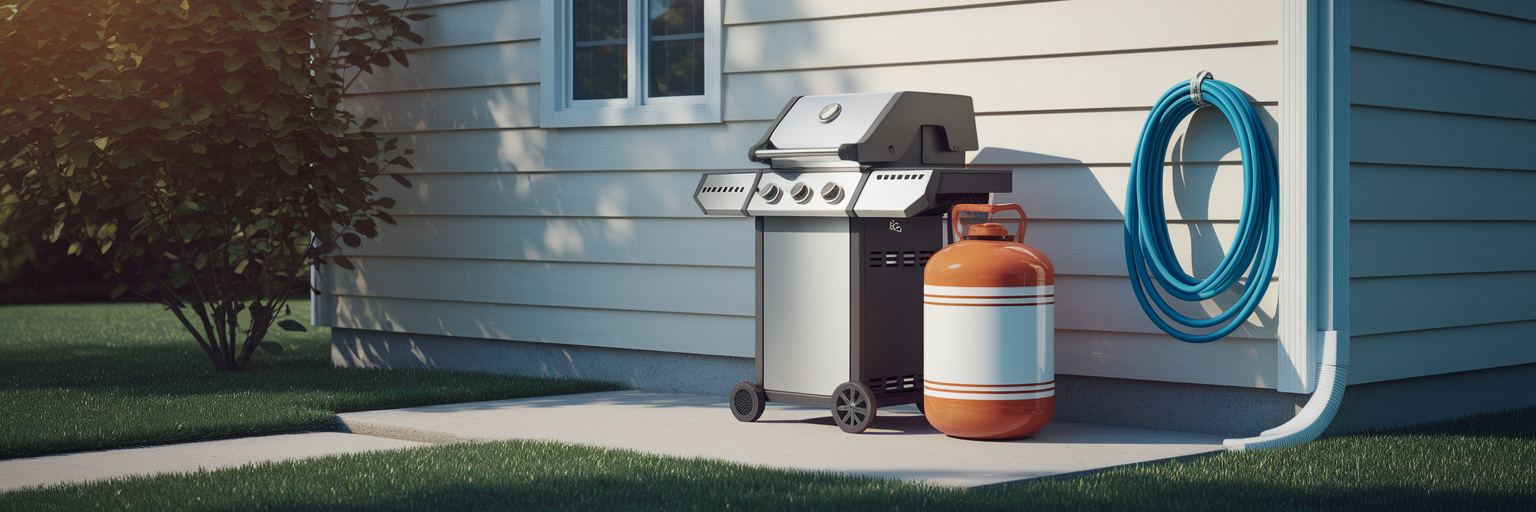
We can all picture that moment: the backyard is full of guests, the burgers are ready, and the gas grill sputters out. That initial frustration is common, but the good news is that many propane tank issues are surprisingly simple to diagnose and resolve yourself. This guide is designed to walk you through practical propane tank troubleshooting, empowering you to handle minor problems with confidence.
Before you touch a single valve or hose, your first step is always safety. All checks and adjustments should be performed outdoors in a well-ventilated area, far from any open flames or potential ignition sources. With that priority established, we will cover the most frequent culprits: low fuel, potential leaks, weak flames, and ignition failures.
First Steps for Propane Tank Troubleshooting
We can all picture that moment: the backyard is full of guests, the burgers are ready, and the gas grill sputters out. That initial frustration is common, but the good news is that many propane tank issues are surprisingly simple to diagnose and resolve yourself. This guide is designed to walk you through practical propane tank troubleshooting, empowering you to handle minor problems with confidence.
Before you touch a single valve or hose, your first step is always safety. All checks and adjustments should be performed outdoors in a well-ventilated area, far from any open flames or potential ignition sources. With that priority established, we will cover the most frequent culprits: low fuel, potential leaks, weak flames, and ignition failures.
Checking Fuel Levels and Basic Connections
Often, the problem is simpler than you think. Before assuming a mechanical failure, the first thing to do is confirm you have enough fuel and that everything is connected properly. A loose connection or an empty tank accounts for a majority of appliance issues.
How to Determine if the Tank is Empty
Guessing how much propane is left is a recipe for a half-cooked dinner. Instead of shaking the tank, you can use a couple of reliable methods to check propane tank level. The most accurate approach is using a scale. A standard 20-pound backyard grill tank weighs around 17 pounds when empty and about 37 pounds when full. Any weight above 17 pounds indicates your remaining fuel.
If you don’t have a scale, the hot water method works well. Carefully pour a bucket of warm tap water down one side of the tank. Then, run your hand along that side. You will feel a distinct cold spot where the liquid propane begins, giving you a rough idea of the fuel level.
Inspecting the Valve and Connections
A poor connection can restrict gas flow or, worse, create a safety hazard. First, ensure all appliance burners are in the “off” position. This prevents the regulator’s safety device from tripping, which can cause a weak flame. When you attach the regulator, hand-tighten the connection until it is snug. Using tools can damage the threads. Once connected, open the tank valve slowly but turn it all the way to the open position. This ensures the valve seals properly and delivers consistent pressure. For more details on equipment handling, review the propane safety insights we have shared.
| Method | How It Works | Pros | Cons |
|---|---|---|---|
| Weight Method | Weighing the tank to determine remaining fuel. | Highly accurate; provides a precise measurement. | Requires a scale; need to know empty/full weights. |
| Hot Water Method | Pouring warm water on the tank; the liquid propane inside cools the metal, creating a condensation line at the fuel level. | No special tools needed; quick and easy. | Less precise; can be affected by ambient temperature. |
| In-Line Pressure Gauge | An accessory that measures pressure inside the tank. | Provides a constant, at-a-glance reading. | Requires purchasing extra equipment; accuracy can vary with temperature. |
This table compares common methods for gauging propane levels. The weight method offers the most accuracy, while the hot water method is a convenient alternative if a scale is unavailable.
How to Safely Identify and Address a Propane Leak

If you have fuel and your connections are tight, the next possibility to investigate is a leak. Propane is naturally odorless, so manufacturers add a chemical called mercaptan that gives it a distinct smell, often compared to rotten eggs or sulfur. This odor is your primary signal that propane may be escaping.
To confirm a leak, you can perform a simple soapy water test. Here’s how:
- Mix a solution of dish soap and water in a small bowl or spray bottle.
- With the tank valve open, apply the solution to the cylinder valve, regulator, and hose connections using a sponge or brush.
- Watch closely for bubbling. The formation of bubbles, big or small, confirms a gas leak.
If you smell gas or the soapy water test reveals a leak, you must act immediately. Your knowledge of how to fix propane leak starts with this critical safety protocol:
- Immediately and completely close the valve on the propane tank.
- Extinguish all nearby open flames, including cigarettes and pilot lights.
- Do not use any electronics or light switches nearby, as an electrical spark can ignite the gas.
- Move everyone away from the area.
If the leak is small and stops after tightening a connection, you can re-test. If the leak persists or is coming from the tank body itself, leave the area and call a professional. If you feel the situation is unsafe, do not hesitate to contact our team or your local fire department from a safe distance.
Fixing Low Heat and Weak Flames
One of the most common complaints is a propane grill weak flame that just won’t get hot enough. You have a full tank, but the flames are low and lazy. This issue is rarely a sign of a broken grill. Instead, it’s usually caused by the tank’s regulator safety feature. This internal mechanism can trip if it detects a sudden rush of gas, which happens when you open the tank valve too quickly. It mistakes this for a major leak and restricts the gas flow to a trickle.
Fortunately, resetting the regulator is simple. This is a frequent source of propane regulator problems, and the fix takes just a few minutes:
- Turn off all the burner knobs on your appliance.
- Close the propane tank valve completely and disconnect the regulator from the tank.
- Wait for five minutes. This allows the regulator’s internal mechanism to reset.
- Reconnect the regulator to the tank, ensuring it is hand-tight.
- Open the tank valve very slowly, just a quarter or half turn at first. This is the most important step.
- Wait a minute, then light your appliance as you normally would.
If the flame is still weak, check for obstructions. Spiders are known to build webs inside the burner tubes, blocking gas flow. Cleaning these tubes with a venturi brush, a tool available at most hardware stores, can restore proper performance. You can explore the different types of propane equipment we offer to better understand how these components work together.
What to Do When Your Appliance Fails to Ignite

If you can hear and smell gas flowing but the appliance won’t light, the problem likely lies with the ignition system. This is different from a weak flame, as the issue isn’t gas flow but the spark needed to ignite it. A few quick checks can pinpoint the cause.
- Listen for the click. When you press the igniter button, you should hear a distinct clicking sound. If it’s silent, the battery is the most likely culprit. Most modern grills have a battery-powered igniter, usually a single AA or AAA, located behind the button.
- Inspect the electrode. Look at the small metal prong (the electrode) next to the burner. Ensure the wire is securely attached to its base. The ceramic-coated electrode should be clean and positioned about 1/8 to 1/4 of an inch from the burner—roughly the thickness of two dimes.
- Clear the burner ports. Grease and debris can clog the small holes in the burner right next to the igniter. Use a paperclip or small brush to clear them out.
If you’ve tried these steps and it still won’t light, perform one final test. Carefully use a long match or a stick lighter to manually light the burner. If it ignites right away, you have confirmed the problem is with the ignition system, which may need replacement.
Understanding Frost Buildup and Tank Condition
Have you ever noticed a line of frost forming on your propane tank during use? This isn’t necessarily a sign of a problem. It’s a simple display of physics. As your appliance draws fuel, the liquid propane inside the tank boils and turns into gas. This process, called vaporization, absorbs heat from the tank’s metal walls, making them intensely cold. The cold surface then freezes the moisture in the surrounding air, creating frost.
This effect is most common when you’re using a lot of gas at once, like running all burners on high. If you see frost, the best course of action is to turn off the appliance for a while and let the tank return to a normal temperature. However, you should also use this as a reminder to inspect the tank’s overall condition. Look for excessive rust, deep dents, or significant corrosion, especially around the base. A physically compromised tank is a serious safety hazard and should be taken out of service immediately.
Best Practices for Propane Tank Storage and Handling
Proper handling and storage are fundamental to safety and performance. Following a few simple rules for safe propane tank storage prevents most issues before they start. Whether you have one tank for your grill or several for other appliances, these guidelines are essential.
- Always store tanks upright. Storing a tank on its side can cause the pressure relief valve to malfunction.
- Keep them outdoors. Never store propane tanks in a garage, shed, basement, or any enclosed area. A well-ventilated space outdoors is the only safe option.
- Avoid heat and sun. Keep tanks in a shaded spot and away from heat sources like air conditioning units or direct sunlight, which can increase pressure inside the tank.
It’s also important to check the tank’s expiration date. Stamped on the collar, this date indicates when the tank needs recertification, typically every 5 to 10 years. An expired tank should not be refilled. When transporting a tank, always secure it in an upright position in your vehicle and keep the windows slightly open for ventilation. If your tank is expired or damaged, you can find a location for exchange or service by searching for propane near you.
Knowing When to Call a Professional
This guide covers the most common issues you can safely address at home. However, it’s just as important to recognize when a problem is beyond a DIY fix. If you’ve tried these troubleshooting steps and the issue persists, it’s time to call a certified technician. Your safety is the top priority.
Contact a professional immediately if you encounter a damaged or stuck valve, a leak that doesn’t stop after tightening a connection, or a tank that is visibly damaged or expired. Ultimately, trust your judgment. If a situation feels unsafe or you’re unsure how to proceed, the right decision is always to step back and get expert help. For homeowners seeking reliable support, learning more about professional residential propane services is a great next step.
About Jennifer Whitaker
Propane industry expert and content contributor for MyPropane.com.
View all posts by Jennifer Whitaker →Related Articles

Efficient Propane Management for Rural Properties
Dec 5, 2025 • 7 min read
Discover modern methods for tracking fuel supply across several tanks to ensure your property never runs dry.

Lower Your Winter Bills With Smart Propane Use
Oct 5, 2025 • 7 min read
Learn actionable strategies to reduce heating costs and ensure a reliable fuel supply throughout the colder season.